Archive for the Patient Category

Exercise_Select Your Program_Intro

Jump to:

For those living with cirrhosis, please review the medical disclaimer presented on the “Exercise in Cirrhosis” webpage.

This exercise program is intended to be completed with the knowledge and clearance of your physician to ensure that it is appropriate, modified as necessary, and safe.

For individuals with other chronic diseases, please consult your physician in advance of engaging in this exercise program.

AEROBIC

Begin by including 5 minutes of aerobic activity on 4 days each week. For example, take a walk down the street or in a local mall. If you need to, take short rests (1 minute) either standing still or sitting down.

The goal is to reach and maintain between 3 to 5 on the Borg Scale – breathing stronger but can still carry on a conversation. If you reach 6 or higher on the Borg Scale, take a rest, then resume the activity.

Once you can complete 5 minutes of continuous aerobic activity, increase the session by 1 to 2 minutes.

Remember to listen to your body and take rests if necessary or decrease the duration.

Other examples of aerobic activity are: swimming, cycling, curling, lawn bowling, dancing, cleaning the garage, mowing the lawn, shoveling snow, and washing the car. Any activity can be “aerobic exercise” providing that the heart rate and breathing are increased.

MUSCLE STRENGTHENING

Resistance exercises improve muscle condition and strength. These exercises target muscle groups in the upper, lower, and middle (torso) of the body.

Each week, do 2 sessions separated by a few days, such as Tuesday & Friday or Thursday & Saturday.

  • Each session should include 3 exercises, with 1 exercise for each body segment: upper, lower, and middle.
  • Select different upper and lower body exercises for each session so that all muscle groups are similarly improved.
  • For each exercise, start with 2 sets of 10 repetitions each. Gradually increase to 3 sets of 15 repetitions.

Once this is achieved, progress to 4 exercises per session.

During this session, aim to reach and maintain levels 3 & 5 on the Borg Scale – breathing moderately but can still talk.

Lateral Arm Raises

(upper body)


Arm Curls

(upper body)


Seated Triceps Extension (without banding)

For Intro level, perform this without using resistance banding. (upper body)


Seated Leg Extensions

(lower body)


Standing Leg Curls

For the Intro level, this can be performed without the resistance banding. (lower body)


Seated Calf Raises

This can be done either seated or lying down. (lower body)


Chair Sit-to-Stand

(middle or torso)


FLEXIBILITY

Start with 1 set of 3 repetitions.  Hold each stretch for roughly 20 seconds or until you count to 20..

  • “One Mississippi, two Mississippi, three Mississippi” and so on..

These should be done twice a week. Can be done after the Muscle Strengthening session, on their own, or combined with a Balance session.

Other stretches that can be performed while seated are: lateral side bends, chest reach, and chair-sit and reach.

Shoulder Stretch

For INTRO, perform the stretch while seated.


Triceps Stretch

For the INTRO level, perform the stretch while seated. The triceps are located in the back of the upper arm between the shoulder and elbow.


Seated Hamstring Stretch

The hamstring muscles run along the the back of the thigh between the hip and the knee.


BALANCE

Start with 1 set of 3 repetitions and these should be done twice per week.

This can be done after a Muscle Strengthening session, combined with a Flexibility session, or its own.

Slow and steady is the rule so that multiple muscle groups are involved in controlling fine, well coordinated movements.

Knee to Chin Raises

This can be modified to a sitting position. When seated and the feet flat on the floor, lift one knee up to the chest. Keep the back straight. Repeat with the other leg. Complete for the recommended number of repetitions.


EXAMPLE of a Weekly INTRO Exercise Program


Aerobic: At least 4 times each week, walk continuously for 5-10 minutes. Remember to take a short break if you need to catch your breath!

Muscle strengthening: On 2 different days, do 2 sets of 10 repetitions of each of the following exercises:

  • Arm curls
  • Seated calf raises
  • Chair-sit-to-stands

Flexibility: On 2 different days, perform all stretches 2-3 times lasting 20-30 seconds on each side.

Balance: On 2 different days, perform 3 repetitions of 10 steps each.

Arm curls

Seated calf raises
Chair Sit-to-Stands

Stages of Cirrhosis

Cirrhosis can be divided into 2 stages, Compensated Cirrhosis and Decompensated Cirrhosis.

For most people, cirrhosis progresses (or gets worse) over time, but if the main cause of cirrhosis is treated (like quitting alcohol or getting rid of hepatitis C), it can help a lot.

Cirrhosis can shorten the length of a person’s life, but in many cases does not. The only cure for cirrhosis is liver transplant. It is important to understand that liver transplant is a major surgery with many potential risks, and is not recommended for everyone with cirrhosis.

No matter what stage your cirrhosis is at, your healthcare team will work with you to manage any symptoms or major complications that you have.

Compensated Cirrhosis

At first, you may have no symptoms at all. This is called compensated cirrhosis. People with compensated cirrhosis may live many years without being aware that their liver is scarred. This is because the pressure in the portal vein is not too high, and there are still enough healthy liver cells to keep up with the body’s needs. In other words, although the liver is scarred, it is still able to do its jobs.

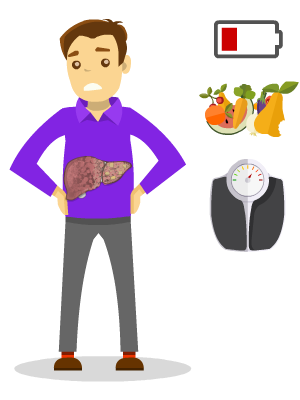
But if the cirrhosis is not diagnosed and treated, the pressure in your portal vein gets higher. The few remaining healthy liver cells get overwhelmed. Then you may notice symptoms like:

  • low energy
  • poor appetite
  • weight and muscle loss
  • depressed mood
  • itching
  • loss of sexual function


Decompensated Cirrhosis

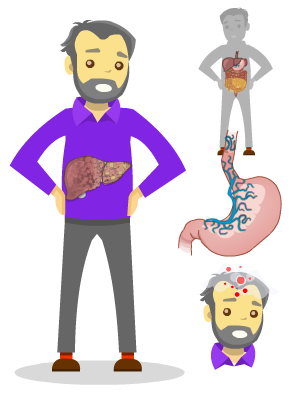
As cirrhosis progresses even more, you can develop major complications. These can be related to portal hypertension or because the liver can’t do its factory jobs as well as it did before.

The most common major complications are:

When you have developed any of these major complications, it’s called decompensated cirrhosis.

Having decompensated cirrhosis is a sign that you’ll need to work closely with your healthcare team to manage your symptoms and complications. Your healthcare team may suggest you be assessed for a liver transplant.

References:

The information on this page was adapted (with permission) from the references below, by the Cirrhosis Care Alberta project team (physicians, nurse practitioners, registered nurses, registered dietitians, physiotherapists, pharmacists, and patient advisors).

This information is not intended to replace advice from your healthcare team. They know your medical situation best. Always follow your healthcare team’s advice.

References: 

  1. US Department of Veterans Affairs, Veterans Health Administration 
Last reviewed March 15, 2021

Stereotactic body radiation therapy (SBRT)

Stereotactic body radiation therapy (SBRT) involves careful delivery of high-powered radiation beams to the tumor. With HCC, SBRT uses radiation to destroy the tumor.

SBRT is usually performed at a cancer treatment centre by a doctor specializing in radiation and cancer treatment, called a Radiation Oncologist. It is usually performed as a day procedure, meaning you will come into the centre, have the procedure done, and go home the same day.


Before the Procedure

Before the SBRT procedure, you will be asked to go to the treatment centre for two sessions to prepare you for the procedure.

At the first session, you will have tiny metal objects called markers placed in the liver, on or near the tumor. The markers will be used later to help the doctor pinpoint exactly where the tumor is located. Before the marker placement begins, you will have an intravenous inserted to give you sedative medications. The doctor will go over the procedure and its potential risks and benefits.

Once your questions have been answered, you will receive a mild sedative medicine through your intravenous. The skin over your liver will be cleaned and the doctor will numb the area by injecting freezing under your skin using a small needle. Then the doctor will insert a needle through your skin to insert the markers. You may feel some pressure around the area when the markers are being inserted. After the markers are placed, a CT scan will be used to look inside the liver and make sure they are in the right place.

About one week later, you will come back to the treatment facility for your second session. You may hear your healthcare team call this the ‘mapping day’ because the purpose is to map out the procedure. During this session you will be taught how to breath during the procedure and your measurements will be taken so that a custom mold can be made for you. You may also be asked to try on a special belt that will help compress your belly. The mold and the belt are used to keep your body still and reduce movement of the liver. You will also have a scan done to map out the exact location of your tumor and help the team decide the best dose of radiation needed to treat your tumor.


The Procedure

About 2-3 weeks later, your SBRT procedure will begin. SBRT is usually done over a series of 5 short treatments… taking place every other day… It is recommended that you don’t have anything to eat or drink for 2-3 hours before the procedure.

When you arrive in the procedure room, you will be asked to lay down in your custom mold and might also be asked to wear a compression belt. The radiation machine will then be turned on and used to deliver radiation to the tumor from many different angles, using the markers that were placed in in the first session for guidance. The markers help reduce the chance of damaging the non-cancerous parts of the liver. The machine will rotate a full 360 degrees around the tumor so that radiation can be delivered to it from all sides.  You should not feel any pain during the procedure. SBRT usually takes about 45 minutes, but the machine may only be on for 5-15 minutes.


After the Procedure

Most people tolerate SBRT well and are able to carry out regular activities after the procedure. You may notice temporary nausea, tiredness, or skin irritation.  Please call your doctor or nurse if you have any questions about symptoms that develop after the procedure.

The markers will stay in your body and won’t have any harmful effects. Your healthcare team will arrange a follow-up scan which will involve taking pictures of the liver and using a special contrast dye to help make the tumor area more visible. This is usually done about 2-3 months after the final SBRT procedure. Based on the results of your scan, your healthcare team will decide if any more treatment for your HCC is recommended and when more scans are needed.

You should also continue to monitor yourself for the development of any new symptoms and have blood work checked as recommended so your healthcare team can monitor your liver function.

SBRT is not usually considered curative, meaning it does not cure liver cancer. Instead, it is used to slow the growth down. Depending on how well it works, how many tumors you have, and your liver function, more HCC procedures may be recommended for you in the future.

References:

The information on this page was adapted (with permission) from the references below, by the Cirrhosis Care Alberta project team (physicians, nurse practitioners, registered nurses, registered dietitians, physiotherapists, pharmacists, and patient advisors).

This information is not intended to replace advice from your healthcare team. They know your medical situation best. Always follow your healthcare team’s advice.

References: 

  1. US Department of Veterans Affairs, Veterans Health Administration 
  2. Canadian Liver Foundation
Last reviewed March 15, 2021

Embolization

Embolization is performed in the hospital, usually by a specially trained doctor called an Interventional Radiologist. Depending on the type of embolization procedure you have, you may need to stay overnight in the hospital, or you might be able to go home the same day.

The Procedure:

Before the procedure begins, you will have an intravenous placed to give you medications. In the procedure room, you will lay on the procedure table and a nurse will set up monitors to measure your blood pressure, heart rate and oxygen levels. The doctor will go over the procedure and its potential risks and benefits.

The procedure will begin with you receiving sedation through your intravenous to make you more relaxed. You may also be given antibiotics. In some cases you may be given general anesthesia. The doctor will then make a small cut in your upper leg. Through this cut, a thin flexible tube (called a catheter) will be placed inside a blood vessel in your leg. In some cases, this catheter might be inserted through a blood vessel in your wrist instead.

The doctor will guide the catheter through the blood vessel… until it reaches your liver…and then guide it to the tumor. Special scans will be used during the procedure to see where the catheter is at all times.

Once the catheter reaches the tumor, particles will be injected through the catheter to block blood flow and shrink the tumor.

There are 3 different types of embolization:

  • Bland Embolization: During Bland embolization bland particles are injected into the tumor to block off it’s blood
  • Transarterial Chemoembolization (TACE): the particles injected through the catheter block off the blood supply and  also contain chemotherapy medication that helps destroy the tumor.
  • Transarterial Radioembolization (TARE): the particles supplied to the site of the tumor contain radioactive material that helps to destroy the tumor. If you are booked for a TARE procedure, you may need to come in for a simulation appointment a few days before the treatment so the healthcare team can take pictures of your liver and give you test doses to plan for the actual procedure.

Pain, fever and nausea can happen with the embolization procedures, but medications can be given to manage these symptoms. No matter which type of embolization procedure you have, it will usually take 1 to 2 hours. After the embolization is complete, the catheter is removed and a dressing is placed over the area the cut was made. In most cases, you will be asked to rest and lie flat for up to 6 hours.

After the Procedure:

For the first 10 days after your embolization, you should take it easy, drink lots of water, and avoid strenuous activities or lifting more than 5lbs. Each person’s recovery experience will be different. Some people may feel tired for up to 3 weeks after the embolization. If you develop fever or chills, sudden or worsening pain, trouble eating or drinking because of nausea and vomiting, bleeding or swelling at the site where the cut was made, or any other new or concerning symptoms, please contact your doctor or nurse right away.

Your healthcare team will arrange a follow-up scan (like ultrasound, MRI or CT) which will involve taking pictures of the liver and using a special contrast dye to help make the tumor area more visible. This is usually done about 1-3 months after the embolization. Based on the results of your scan, your healthcare team will decide if any more treatment for your HCC is recommended and when more scans should be done. Scans are usually done more often in the first 2 years after treatment.

You should also continue to monitor yourself for development of any new symptoms and have blood work checked as recommended so your health care team can monitor your liver.

Embolization procedures are not usually considered curative, meaning they do not cure liver cancer. Instead, they are used to shrink HCC tumors or slow down their growth. Depending on the type of embolization you have, how well it works, how many tumors you have, and your liver function, more HCC procedures may be recommended for you in the future.

References:

The information on this page was adapted (with permission) from the references below, by the Cirrhosis Care Alberta project team (physicians, nurse practitioners, registered nurses, registered dietitians, physiotherapists, pharmacists, and patient advisors).

This information is not intended to replace advice from your healthcare team. They know your medical situation best. Always follow your healthcare team’s advice.

References: 

  1. US Department of Veterans Affairs, Veterans Health Administration 
  2. Canadian Liver Foundation
Last reviewed March 15, 2021

Ablation

Ablation is performed in the hospital, usually by a specially trained doctor called an Interventional Radiologist. It is usually performed as a day procedure, meaning you will come into the hospital, have the procedure done, and go home the same day. In some situations it could be performed in the operating room by a surgeon.

The Procedure:

Before the procedure begins, you will have an intravenous placed to give you medication. In the procedure room, you will lay on the procedure table and a nurse will set up monitors to measure your blood pressure, heart rate and oxygen levels. Depending on the type of the type of ablation, you may also have grounding pads placed under your thighs to allow electricity to exit your body. The doctor will go over the procedure and its potential risks and benefits.

The procedure will begin with you receiving sedation through your intravenous to make you more relaxed. In some cases you may be given general anesthesia. The doctor will clean your skin and inject freezing in the area over the liver where the procedure needle will be inserted.

After this, the doctor will use an ultrasound or a CT scan to guide the procedure needle through your skin, into the tumor. Once the needle is in place, the ablation can begin. There are three types of ablation that can be used to destroy the tumor.

  • Radiofrequency Ablation (RFA): radio waves will be sent through the procedure needle, into the tumor. Radio waves create heat that destroys the tumor.
  • Microwave Ablation (MWA): involves microwaves being sent through the procedure needle, into the tumor. Microwaves create heat that destroys the tumor.
  • Percutaneous Ethanol Injection (PEI): ethanol is injected into the tumor through the procedure needle. Ethanol destroys the tumor by causing it to dry up. PEI can be used on its own, or in combination with RFA.

During the ablation procedure, you may feel mild discomfort including a feeling of heat or mild pain in the area being treated. After the ablation is complete, the procedure needle will be removed and you will be moved to a recovery area to be monitored before being discharged. The entire time you will be at the hospital is usually about 4 to 8 hours.

After the Procedure:

The tumor area that was destroyed with the ablation will turn into scar tissue.

After you go home, you should monitor yourself for symptoms. If you have severe pain or fever, please call your doctor or nurse or go to the nearest emergency department.

Your healthcare team will arrange a follow-up scan (like ultrasound, MRI or CT) which will involve taking pictures of the liver and using a special contrast dye to help make the tumor area more visible. This is usually done about 1-3 months after the ablation. Based on the results of your scan, your healthcare team will decide if any more treatment for your HCC is recommended and when more scans should be done. Scans are usually done more often in the first 2 years after treatment.

You should also continue to monitor yourself for development of any new symptoms and have blood work checked as recommended, so your health care team can monitor your liver.

Ablation procedures may be done just once or even several times on the same tumor. They can also be done in multiple spots if you have more than one tumor in your liver.

References:

The information on this page was adapted (with permission) from the references below, by the Cirrhosis Care Alberta project team (physicians, nurse practitioners, registered nurses, registered dietitians, physiotherapists, pharmacists, and patient advisors).

This information is not intended to replace advice from your healthcare team. They know your medical situation best. Always follow your healthcare team’s advice.

References: 

  1. US Department of Veterans Affairs, Veterans Health Administration 
  2. Canadian Liver Foundation
Last reviewed March 15, 2021

Diagnosis

Several tests are used to diagnose HCC. The most important ones are lab tests, physical examination, and imaging tests. In some cases, liver biopsies are also done.

Lab Tests 

Your healthcare provider will order lab tests and bloodwork to check how well your liver is functioning. One of your lab tests will be an AFP test. AFP stands for alfa-fetoprotein. A high level of AFP can be a sign of HCC. If you’re considered to be at increased risk of developing lHCC, you may get an AFP test along with an ultrasound every 6 months.

Physical Exam

Your doctor might also give you a physical exam. They’ll check your skin for signs of jaundice. They might feel your abdomen for lumps or a change in the size of your liver. They’ll also check for ascites, which is a buildup of fluid in the abdomen (belly).

Imaging Tests

Imaging tests are key to diagnosing HCC. HCC can usually be diagnosed solely by imaging tests such as ultrasound, MRI, and CT scan.

Ultrasound

An ultrasound of the abdomen is often the first imaging test that’s ordered. It can identify abnormal masses in the liver such as a tumor. It’s also used to screen for HCC in people who have a higher risk of developing the disease. High-risk patients usually get an ultrasound every 6 months to screen for HCC.

CEUS (Contrast Enhanced Ultrasound)

This is a type of ultrasound that uses microbubble contrast dye to look for tumprs in the liver. There’s no problem doing CEUS with poor renal function. CEUS is only available in a few highly specialized centres.

MRI

An MRI can provide more detail about blood vessels, organs, and lymph nodes. It’s useful for showing subtle differences in cells, and it can make it easier to see the liver and any tumors when there is fat in the liver.

When you get an MRI, you’re injected with a special dye called a contrast. If you have kidney problems or an allergy to iodine, the contrast dye most commonly used for MRIs might be safer for you than the one used for CT scans.

CT Scan

A CT scan combines a series of X-ray views taken from many angles to create a 3D image. It’s associated with a higher exposure to radiation.

CT scan images can provide much more information than plain X-rays. For HCC, a CT scan can show tumors and the blood vessels that the tumors might be growing into or around. A CT scan can also look at surrounding organs and check if the cancer is spreading into lymph nodes and other areas.

When you get a CT scan, you’re injected with a special dye called a contrast. The contrast dye makes the liver more visible.

Liver Biopsy

A liver biopsy removes cells or tissues from your liver so they can be viewed under a microscope for signs of cancer.

A biopsy isn’t usually required to diagnose liver cancer. However, if the tumor doesn’t look like a typical HCC on a CT scan or MRI, a biopsy can be helpful to ensure the diagnosis is accurate prior to treatment.

References

This material was adapted (with permission) from:

US Department of Veterans Affairs, Veterans Health Administration 

Canadian Liver Foundation

TIPS (Transjugular Intrahepatic Portosystemic Shunt)

TIPS is a procedure that lowers pressure in the portal vein. That’s the vein that moves blood to your liver. The medical name for it is transjugular intrahepatic portosystemic shunt. Most people just call it TIPS.

When pressure in the portal vein gets too high (called portal hypertension), it can back up and make the veins around your stomach and esophagus, or food pipe, swell. These swollen veins are called varices. If they swell too much, they break open and bleed. This is called variceal bleeding. High pressure can also cause fluid to leak out and build up in your belly (ascites) or around your lungs (pleural effusion).

Doctors might use a TIPS procedure to treat variceal bleeding, ascites, or pleural effusion, when other treatments aren’t working.

The Procedure

Before the procedure, you’ll get a general anesthetic that puts you to sleep. The doctor will insert a thin, flexible tube, called a catheter, into a blood vessel in your neck. They’ll use an imaging test, usually an x-ray with contrast dye, to guide the catheter until it gets to your liver. Then the doctor will create a channel from the hepatic vein (the vein that takes blood out of the liver), to the portal vein. This channel allows blood to bypass your liver.

The TIPS stent, which is a wire mesh tube, will be placed to keep the channel open. Then, the doctor can measure the blood flow in your veins to make sure the pressure drops. If it’s still too high, they might use a balloon on the catheter to open the stent wider. The procedure usually takes 2 to 4 hours.

After the Procedure

After the procedure, you’ll stay in the hospital, but most people can go home after a day or 2. It can take weeks or months for the TIPS to work. So if you have fluid build-up in (ascites or pleural effusion), it may take time for the fluid to go away.

After you go home, rest and drink lots of water. For at least 10 days, don’t do heavy exercise (like running), and don’t lift more than 10lbs (4.5 kg). You can still do gentle activity, like walking, each day.

It’s really important to watch for symptoms like memory trouble, feeling sleepy, and balance problems. Also watch for yellow skin and swollen legs. Call your doctor or nurse right away if you have any of these symptoms.

You’ll need to have follow-up tests to help your healthcare team check your progress. The TIPS stent can get narrower over time. If this happens, you may need another procedure to make it wider.

Risks and Side Effects

A TIPS procedure can help you feel better and lower your chances of complications from varices, ascites and pleural effusion. But just like any procedure, there are risks and side effects you should know about. You’ll do tests before the procedure to check your risk of side effects.

Because it’s the liver’s job to filter toxins out of your blood, sending some blood through the TIPS means less of it goes through the liver to get filtered. This can cause toxins to build up in your body. Toxin buildup is called hepatic encephalopathy. It can cause you to feel confused, have balance problems, and feel sleepy. About 3 out of 10 people will get hepatic encephalopathy after a TIPS. It can usually be treated with medicine.

Some people might have more liver problems because less blood goes to the liver. Or they might have heart problems because more blood flows into the heart through the TIPS. If you get major problems that can’t be managed with medicine, your doctor may block off the TIPS stent.

Other side effects are rare. This procedure could cause bleeding, infection, or damage to your kidneys or lungs

References:

The information on this page was adapted (with permission) from the references below, by the Cirrhosis Care Alberta project team (physicians, nurse practitioners, registered nurses, registered dietitians, physiotherapists, pharmacists, and patient advisors).

This information is not intended to replace advice from your healthcare team. They know your medical situation best. Always follow your healthcare team’s advice.

References: 

  1. US Department of Veterans Affairs, Veterans Health Administration 
  2. Canadian Liver Foundation
Last reviewed March 15, 2021

Thoracentesis

Thoracentesis is a procedure that uses a needle to drain fluid from the space around the lungs (called pleural effusion)

It can be caused by many different conditions, including cirrhosis. If you have a pleural effusion, you may have pain or feel short of breath.  Your healthcare team might suggest a thoracentesis to remove a large amount of fluid from around your lungs to make it easier for you to breathe. Or, they might want to collect a fluid sample for testing.

The Procedure

Before your procedure, the doctor or nurse practitioner will check your chest for a good spot to insert the needle. They’ll do this by tapping on your chest or by ultrasound, where sound waves are used to show a picture of the fluid. When they’ve chosen the best spot, they might put freezing medicine under your skin. This will numb the area and should make you more comfortable. You may still feel a very brief, sharp pain during the procedure.

Next, they’ll insert a needle to drain the fluid. If there’s a lot of fluid, they’ll drain it into containers connected to the needle by a small tube. When the fluid has finished draining, they’ll remove the needle and bandage the spot.

After the Procedure

Sometimes, your healthcare team will order a chest x-ray after your procedure to see if there’s any fluid left, or to check for problems. They might also check your fluid to make sure you don’t have an infection. If you have infection, you’ll probably need to be admitted to the hospital for treatment.

If you go home the same day as your procedure, you’ll probably be at the hospital for 2 to 3 hours. But if you need a lot of fluid drained, you’ll probably be admitted to the hospital for a day or 2.

After the procedure, keep your bandage on for 24 hours. Then, if there is no fluid leaking from the needle site, you can remove the bandage and have a shower. You can wash the needle site gently with soap and warm water. You might feel sore for a few days, but you can go back to your normal activities unless your nurse or doctor gives you other instructions.

If you have a pleural effusion, it’s very important to eat less salt. This helps slow down the fluid buildup around your lungs. Some people need a thoracentesis only once. Others need one every week or 2. Your healthcare team will work with you to decide how often is best for you.

Risks and Side Effects

Just like any medical procedure, thoracentesis has risks you should know about. In rare cases, infection, bleeding, or damage to the liver or spleen can happen. Also, there can be a small risk of a partial collapse of the lung. Sometimes, air can enter the space around the lung. This is called a pneumothorax.

If you have trouble breathing after the procedure, or have pain, fever, bleeding, or fluid is leaking from the needle site, call your doctor or nurse or go to the emergency department right away.

References:

The information on this page was adapted (with permission) from the references below, by the Cirrhosis Care Alberta project team (physicians, nurse practitioners, registered nurses, registered dietitians, physiotherapists, pharmacists, and patient advisors).

This information is not intended to replace advice from your healthcare team. They know your medical situation best. Always follow your healthcare team’s advice.

References: 

  1. US Department of Veterans Affairs, Veterans Health Administration 
  2. Canadian Liver Foundation
Last reviewed March 15, 2021

Paracentesis

To view this video with Spanish subtitles, Click Here.


Paracentesis is a procedure that uses a needle to drain fluid from the abdomen (called ascites). Ascites can be caused by other conditions, but here we will go over having a paracentesis for ascites caused by cirrhosis. If you have ascites, you may have pain, feel short of breath, or have trouble eating because your belly feels full.

If you have these symptoms, your healthcare team might suggest a paracentesis to remove a large amount of the fluid from your belly. Or, they might want to collect a fluid sample for testing.

The Procedure

Before your procedure, the doctor or nurse practitioner will check your belly for a good spot to insert the needle. They’ll do this by tapping on your belly or by ultrasound, where sound waves are used to show a picture of the fluid.  When they’ve chosen the best spot, they might put freezing medicine under your skin. This will numb the area and should make you more comfortable. You may still feel a very brief, sharp pain during the procedure.

Next, they’ll insert a needle to drain the fluid. If there’s a lot of fluid, they’ll drain it into containers connected to the needle by a small tube. They might ask you to change position to help drain the fluid more easily. When your fluid has finished draining, the team will remove the needle and bandage the spot.

If you had a lot of fluid, your doctor or nurse practitioner might prescribe a protein called albumin. You take albumin through an intravenous, or IV, which is a small tube or needle put in a vein. It lowers your risk of problems from the drainage.

You’ll likely be at the hospital anywhere from 2 hours to a full day. It depends on how much fluid you have drained and how much albumin you need.  If your fluid comes back showing you have an infection, you’ll probably be admitted to the hospital for treatment. This is not common, but it can happen.

After the Procedure

After the procedure, keep your bandage on for 24 hours. Then, you can remove it and have a shower. You can wash the needle site gently with soap and warm water.  You might feel sore for a few days, but you can go back to your normal activities unless your nurse or doctor gives you other instructions.

Some people need a paracentesis only once. Others need one every week or 2. Your healthcare team will work with you to decide how often is best for you. If you have ascites, it’s very important to eat less salt. This helps slow down the fluid buildup in your belly and give you more time until your next paracentesis.

Risks and Side Effects

Just like any medical procedure, paracentesis has risks you should know about. In rare cases, infection, bleeding, or a tear in the lining of the intestine can happen.

If you get belly pain, fever, bleeding, or fluid is leaking from the needle site, call your doctor or nurse or go to the emergency department right away.

References:

The information on this page was adapted (with permission) from the references below, by the Cirrhosis Care Alberta project team (physicians, nurse practitioners, registered nurses, registered dietitians, physiotherapists, pharmacists, and patient advisors).

This information is not intended to replace advice from your healthcare team. They know your medical situation best. Always follow your healthcare team’s advice.

References: 

  1. US Department of Veterans Affairs, Veterans Health Administration 
  2. Canadian Liver Foundation
Last reviewed March 15, 2021